Showing posts with label Liquid Vinyl. Show all posts

Tuesday, December 10, 2013

Fox nails


I know I’ve been posting Disney nails while I’ve been gone, but I ran out of Disney nails to post so now you are finally going to see the nails I had for Thanksgiving. I loved these nails and I got a ton of compliments on them. Some of my favorite questions I got about these nails were “so how do you put those on, cause I mean there is no way you painted all those lines?” and “that’s a sticker, right?”. Oh, the joy I find when people think my nails are fake or that I used a nail sticker, I’m such an odd duck. Needless to say, these nails were a pretty big hit at Thanksgiving dinner this year.

Like many of my nail art choices, these nails got a terrible song stuck in my head for the duration I had them on. If you haven’t seen What Does the Fox Say? I highly recommend you leave my blog for a few minutes and bask in the strange glory that only YouTube can bring. Finished watching it? Great, for this manicure I used Zoya Channing, Orly Liquid Vinyl, OPI Alpine Snow, and Maybelline Dotty. For those of you keeping track, this is the first time I’ve used Maybelline, and yes, that does make me sound pretentious.
Fox nails

I’m pretty sure this fox is saying “I’m super cute”. I was worried at first that the fox looked too much like a cat but when my 2 ½ year old nephew looked at them and said “fox” I knew that they must have turned out pretty well. (Yes I squealed like a small child when he was able to correctly guess the animal without prompting). I did a fox on my thumb too but none of the pictures turned out very well.
Ringa-ding-ding-ding-doo

I had a few people tell me these were their favorite nails yet, and I totally agree that these are some of my favorites. They were so cute but not so cartoony that I felt weird having them on. One of my good friends from high school and college married a Mr. Fox so now whenever I see a fox I think of her, hopefully she approves of his foxiness J

Sunday, December 8, 2013

Snow White nails


Right after we booked our Disney vacation I decided I wanted to try to see all the Disney animated movies that I had either only seen once or I hadn’t ever seen. This ended up being a much harder task than I originally thought. I’m still about 10 movies shy of seeing all of them (and by all of them I mean the main theatrical releases). Some of them are so obscure and no one seem to have them; however, this is a quest I will finish, you will not best me Disney animated classics. I really want to see the newest movie Frozen, it looks so cute and I just know after I watch it I will think of fun Frozen nails to do.

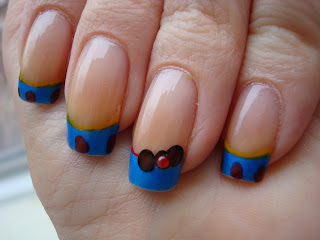
For this manicure I’m going to focus on the first Disney princess. I haven’t seen Snow White since I was a kid, but I remember it being kinda scary, especially when the wicked queen dresses as the old lady, sorry for the spoiler. For this manicure I used China Glaze Splish Splash, Sally Hansen CSM All Fired Up, and Orly Liquid Vinyl.
Snow White nails

These nails looked way cooler in my head and I think part of the problem was that my red sucks. I really need to invest in a more saturated red, the Sally Hansen is a great color but it is very thin so it doesn’t work the way I want it to for nail art. The same can be said of my yellow striper but I don’t use yellow stripers enough for it to bother me like the red situation does. My problem is whenever I go to the store to buy a new solid red I end up buying some glittery fun red, and although that color is fun, it doesn’t replace the solid red like I need it to. Maybe I should put that on my Christmas list.
I keep finding myself singing to woodland creatures with these nails

This is the first time I’ve tried to do a French manicure with the curved line instead of a line that goes straight across, I used hole punch reinforcements as my guide instead of regular scotch tape. The reinforcements worked fine except they didn’t go all the way across on a few of my nails so I had to free hand the edges. Doing the curved line makes them look more feminine I think, I’m going to have to play around with these reinforcements more.

Friday, December 6, 2013

Disney Princess nails


Every once in a while I do nails that I simultaneously love and hate; these are some of those nails. As soon as I did them I thought they were so cute and I was very happy with how they turned out. A day later, however, I started to think that they were staring at me, and by the day after that I had to take them off because they were creeping me out too much. They kept staring at me while I was typing at work, like ten creepy little kids, always watching, always judging. For some reason, I’m don’t like it when my nails could be the subject of a scary movie.

General creepiness aside, these nails are super cute and they really turned out just like I pictured them. For this manicure I used a ton of different polishes: Orly Prelude to a Kiss and Liquid Vinyl, OPI Alpine Snow, Ulta Sun-Sational, Sally Hansen CSM All Fired Up, China Glaze Turned up Turquoise, Zoya Louise, and various stripers.
Disney Princess nails

I think these nails would be better on shorter nails; some of my princess (especially on my right hand) didn’t have the right face proportions because my nails are so long. To be honest, my right hand looked like a bunch of jacked up step sisters and not the real princess at all. I always seem to have issues getting my edges right when I use that Orly, it isn’t a forgiving color at all.
Let’s just pretend there aren’t a bunch of technical issues with these nails

These are definitely the kind of nails that look better from far away; the closer you get to them the creepier they are. I think Jasmine turned out the best and I bet that is partly because she is the smallest one. I want to try this art out on someone with shorter nails and nail beds, perhaps in two years when I can paint my god daughter’s nails I will try it out on her, but perhaps it is way too early to be planning such things. Hope you are enjoying my Disney nails while I’m enjoying Disney J

Wednesday, December 4, 2013

Disney's Tangled nails


I’m not a fan of kids but I love many of the things that they love, Disney is no exception. I first went to Disney World when I was a senior in college and my super amazing coach took me to the Magic Kingdom when we were in Florida for a tournament. I was hooked from my very first glimpse of Cinderella’s castle. Thad’s first trip was on our honeymoon, aka the best honeymoon destination ever. This December marks our third trip together and also our third trip in just over five years, we can’t stay away! So while I’m enjoying the sights and sounds of the most magical place on Earth, I decided to have a couple of blog posts for you to entertain you with Disney nails while I’m at Disney.  

Tangled is such a great movie, if you haven’t seen it I highly recommend that you put it on your list to watch. Also, if you haven’t seen it, these nails won’t be as fantastic for you. For this manicure I used Sally Hansen CSM Anenome of Mine, OPI You’re Such a Budapest, I Saw. . .U Saw. . .We Saw. . .Warsaw, Alpine Snow, and Pussy Galore, Ulta Sun-Sational, and Orly Liquid Vinyl. These nails turned out even better than I had imagined, they are quite possibly some of my favorites I have done.
Disney’s Tangled nails

If you have seen the movie the nails are pretty self explanatory. In case you missed the instant Disney classic, my pinkie and ring finger are parts of her dress, middle finger is her hair (she is Rapunzel after all), my index finger is for the lanterns they light for her birthday every year, and my thumb is the royal symbol. I’m impressed with how well the thumb turned out, I figured I’d try to do something like the sun symbol and it would fail miserably so I would just hide my thumb, I guess when you set your expectations so low you are more likely to impress yourself.  
Seriously, watch the movie

I got Tangled for my birthday from a friend at work and I totally watched it while I was painting these. Hope these nails brought you some Disney joy J

Tuesday, November 26, 2013

Day of the Dead nails


I’m so ashamed that I’m posting my Halloween day nails almost a month after I painted them, I’m hoping that all of my dedicated readers will forgive me, I am lazy after all. We are going on vacation soon and I feel like I’m being swallowed by my endless lists of things I need to get done. We planned this trip about 10 months ago so you would think that I would have had all sorts of time to get everything done, but for some reason it feels like I crammed everything into the last few weeks. I still haven’t decided what nails I’m going to do for the trip, that’s how busy I’ve been!

But I digress; I hope these nails are worth the wait, they were pretty cool. For this manicure I used Orly Liquid Vinyl, Skinny Dip, and White Tips, China Glaze Pool Party and Turned Up Turquoise, Sally Hansen CSM All Fired Up, and Ulta Sun-Sational. These nails were more appropriate for the day after Halloween than for Halloween itself, but it was still fun to have little skulls on my nails for Halloween.
Day of the Dead nails

The best part of these nails was when I took pictures of them and my camera put boxes around each nail as if they were faces, the worst part of these nails was that it was like ten creepy little skulls were staring at me while I was trying to do things like type. It is a general rule of thumb that being a little creeped out by your nails isn’t a good thing.
Cute and Creepy

I truly hate painting my nails white, I don’t know what it is with me but the cuticles always look terrible when I use a white base color. It’s like I’m incapable of painting them correctly as soon as white is added to the equation. Or perhaps I always paint them wrong but the white is just more unforgiving than other colors. Either way, I’m staying away from white for a while.

Monday, November 25, 2013

Catching Fire nails


I’m a huge fan of young adult fantasy fiction, especially when it is in a series - I simply can’t resist them. I also love going to see their movie adaptations; I don’t expect them to be just like the books so I am able to enjoy them for what they are. I feel like I’ve been waiting forever for Catching Fire to come out but it finally did so we went to see it last Friday. We decided against going to the midnight show because, quite frankly, I’m too damn old to be going anywhere at midnight (getting back home after 11pm was pushing it for me). The movie was totally worth the wait and the late hour, my favorite part was when it was over and the guy in front of me said “that’s how it ends?” yes sir, that is how it ends.

As soon as I knew we were going to the movie I started thinking about what my nails should look like, obviously. For this manicure I used Ulta Sun-Sational and Orly Liquid Vinyl, as well as some stripers. I’m pretty happy with how these turned out, I thought the fire ended up looking pretty cool and you can tell what the bow and arrow are supposed to be, at least I think you can.
Catching Fire nails

To get the fire look I started with an orange striper and layered lines on my nail, I didn’t put the brush into the bottle very often so the lines ended up kinda wispy. I put red on top of the orange and did the same thing and then topped it off with gold glitter, because I thought fire should be sparkly, and really I’m going to add sparkle to my nails whenever I get the chance.
The tip wear vexes me

I’ve had a lot of trouble with tip wear lately and I’m not quite sure why. My best guess is that I’m going to bed before they are totally dry and then I’m messing the tips up by pulling up our incredibly heavy quilt. We have probably one of the heaviest blankets that has ever existed. A friend from college made it for our wedding and it is equal parts awesome and lead. I don’t think I’m going to be able to get myself to go to bed any later, so perhaps I need to just put up with the tip wear situation.

Tuesday, October 29, 2013

Spider and Web nails


The McRib is back. Since I found out three days ago I have been thinking about that delicious meat-like-substance nonstop. I have a complicated relationship with the McRib, as soon as it comes out every year I essentially drool over the thought of shoving it in my face until I finally break down and actually buy it. After I get to live out the ‘shove it in my face’ fantasy I immediately regret my decision and feel like I’m going to vomit McRib bits everywhere. Even though I know how this adventure will end, I’m desperate to get a McRib and taste the sweet mechanically formed meat. It’s like a question mark wrapped in barbeque sauce.

The McRib has nothing to do with this manicure, but I’m pretty sure a McRib manicure would be awesome. For this manicure I used Sally Hansen CSM Anenome Of Mine, Orly Liquid Vinyl and White Tips, and China Glaze Riveting. Riveting has to be the best Halloween orange ever, it is so sparkly and fun, I almost forgot how much I liked it!
Spider and Web nails

I know I did a similar design last Halloween but I liked it so much I really wanted to do them again. At least this year I got more legs on my spider, still not the correct number, but I’m two legs closer. I decided to put black rhinestones on the webs and really like how it ended up looking, almost like there are little spiders on the web.
Sunlight is this orange’s friend

I really like how these nails turned out, just simple Halloween fun. It’s kind of funny how much I like spider nail art when I hate real spiders, but then again spiders are evil creatures, hell bent on my destruction, so it makes sense that I don’t like them in person.

Monday, October 28, 2013

Jack Skellington nails


I can’t believe it is so far into October and I haven’t posted any Halloween nails yet! I love Halloween nails so it feels like a waste that I haven’t done more this year. I’m hoping to end October with a bang and give you some good Halloween nails, so these will just be the first ones, unless I get lazy. . . . which is always a possibility.

I got the idea for these nails from my very best friend. She sent me a picture of them and I knew I had to try them, I mean it combines Halloween and Disney, how could I not do them? For this manicure I used Orly Liquid Vinyl and White Tips, which just seems like a somewhat fancy way to say that I used black and white.
Jack Skellington nails

These nails were really fun to have but I found that they were distracting to other people in a way my other nails haven’t been before. I interview people at work and while I had these nails I had like six different applicants comment on them during the course of the interview, I’m not sure why these were so much more distracting than my other nails, maybe it was because I had a big skull on my ring finger. I wish I would have been able to make his eye holes smoother on the edges, but other than that I’m actually pretty happy with the overall design.
Are you frightened?

Truth be told, I think I’ve only seen Nightmare Before Christmas once, perhaps I should look to see if it is on Netflix. . . but then again if I try to watch it on Netflix I might get sucked back into the lazy that only Netflix can cause. Hope my first Halloween nails were worth the wait!

Tuesday, October 22, 2013

Minnie Mouse nails


My goddaughter just turned one and she had a polka dot themed birthday party. As soon as I got the invite I started thinking of all the possible polka dot nails I could do. I think that dots are my favorite nail design, they were certainly my first. When my niece was first born my brother and his wife told me that I could paint her nails when she was three, so I only have two more years to go. I really hope she likes having her nails painted; I want her to think I’m cool and not some crazy woman hell bent on painting her nails.

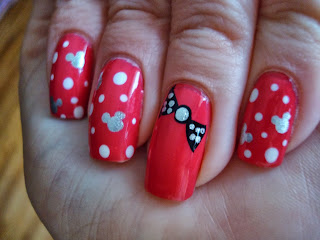
After looking at many dot possibilities I decided to do Minnie Mouse nails, that way I could do dots and Disney. I got to say, I love these nails. I love them so much that I’ve decided that this is the design I’m going to put on my toes for Disney. For this manicure I used Sally Hansen CSM Frutti Petutie, OPI DS Radiance, Orly Liquid Vinyl and White Tips.
Minnie Mouse nails

How freakin cute are these nails? That’s a rhetorical question; I know how cute they are. The mouse design is so simple but it looks so cute, I was in love with these nails from the first Minnie head. I’m bummed only two pictures turned out of these nails, I don’t remember being drunk when I took them but based on how blurry they all were I must have been wasted, or a bad photographer, one of those.
Not sure why this one is so dark

If I were to do them again I would make the bow bigger and more rounded on the edges, I’m going to leave the bow out all together when I do this design on my toes but that is mostly because it’s almost impossible to do nail art on any toe that isn’t your big toe and I want as many Minnie heads as possible. This design would make a wonderful first nail  art design for my niece when she turns three, perhaps planning the design now would be a little too early though J

Friday, September 27, 2013

Little Mermaid nails


It is getting to be my favorite nail time of the year but I’m starting to think I may not have enough time to do all the nails that I want to do. Between Halloween, fall, and Disney nails, I have a lot of plans and I’m simply running out of time (68 days till Disney!). Oh, so many plans, so little time. I guess I just need to paint my nails more J

I want to do different nails for all the Disney Princesses, so I figured I should start with my favorite. I have always loved The Little Mermaid; I had a huge poster of it on the back of my bedroom door when I was a little kid. For this manicure I used Orly Prelude to a Kiss, Liquid Vinyl, and White Tips, China Glaze Gothic Lolita, Turned Up Turquoise, and Mahogany Magic, and Sally Hansen CSM All Fired Up and Mermaid’s Tale. I didn’t realize how many colors I used until I just wrote them all out, wow.
Little Mermaid nails

I found some loose glitter pieces that worked perfect as a mermaid tail on my pinky, they were super annoying to have on though, my hair got all caught up in it while I was washing my hair, not a pleasant experience. I wasn’t really sure what I wanted to do for all my nails and after I did the shell bra it occurred to me that it was a little weird that I focused on Ariel’s chest, I’m sure she will forgive me.
I’m not even sure how I bent my thumb like that

My favorite nail is the Ariel on my thumb, I think she turned out really cute and it makes me want to do a nail like that for all the princesses. I’m going to have to come up with other things to add to them to make them all look different; otherwise all the blondes will look pretty similar.

Not only is today 68 days till Disney, it’s also my 5th anniversary. I’m super lucky to be married to Thad, he is an awesome husband, and I’m pretty sure I could be married to him forever J Happy anniversary honey!

Monday, September 23, 2013

Tuxedo nail step by step


Netflix is evil. They recently changed how they play TV shows so that the next one starts 20 seconds after the last one ended. I have watched a shameful amount of How I Met Your Mother over the last few weeks but there are so many freakin episodes that I’m pretty sure I’m going to be watching this show for the next few months. Oh how TV helps me to be so lazy.

I had a first today! I was asked to do a step by step for my tuxedo nails that I did in June (as part of my wedding nails). I’ve never done a step by step before, but I hope this helps you to recreate my tuxedo nails. For this manicure I used Orly White Tips and Liquid Vinyl, Sally Hansen CSM Wine Not, and China Glaze Rich & Famous. A few disclaimers about my step by step: 1. I didn’t actually want to have tuxedo nails so I only painted two nails 2. I’m a really messy painter so please disregard all the paint that appears to not be on my nails and 3. I don’t actually have a third disclaimer, but it felt like I couldn’t just have two.
I start these nails like I start all nails, with a coat of OPI Nail Envy and SV base coat. On top of that I did two coats of Orly.
To start my tuxedos I painted a V with a black striper and then filled in the bottom of my nail with the Orly brush. To get in the ‘tight’ places I used a dotting tool. Try to get the V as centered on your nail as possible; I didn’t do so well on that front.
Ok, it looks like I did a lot in this step, but I really didn’t. To create the bow tie I did one smallish center dot and then used a dotting tool to create two small triangles off of it. I then put buttons on my tux and the dots on my black nail (I think they sorta look like buttons too). I put one larger white dot on the black tux so I could create the boutonniere.
To make the boutonniere I put a pink dot on top of the white dot and then took my wine color and made small c shapes in the pink with it. It’s ok when you are doing this if the pink swirls with the other color a little, it just makes it look more like a rose.

That’s how I did these nails! If you don’t have a striper you can use any small brush dipped in polish. If you don’t have a dotting tool that’s ok too, you can use the pointed end of a toothpick for the small stuff (like the detail on the flower) or cut the toothpick in half and file it smooth to use for a larger dot (like for the bow tie or buttons). For even larger dots you can use the end of a quilting pin, although you may want to put the pointy end in an eraser or something so you don’t injure yourself.

Hope this step by step was helpful, if you do these nails I would love to know how they turned out, be sure to let me know in the comments J

Friday, September 13, 2013

OPI - I Saw...U Saw...We Saw...Warsaw nails


I went to an awesome bachelorette party last weekend. We drove up north and she had her party on a pontoon boat on a big, beautiful lake. I hadn’t been on a boat all summer and it was just the perfect way to end the season. I was also super proud of myself that I didn’t let myself burn at all, that is a pretty big win when you are pale and you spend a whole day on a boat. I think that last weekend was the official end to my string of weekend plans; I have nothing that I have to go to this weekend, which sounds pretty good.

I really liked these nails even though they were a pain. For some reason I think that blue nail polish is the hardest to work with. It was super difficult to get all the blue off from around my nails and when I took the polish off my fingers were stained blue. For this manicure I used OPI I Saw…U Saw…We Saw…Warsaw, Sally Hansen CSM Gilty Pleasure, Sally Girl Matte Top Coat, and Orly Liquid Vinyl.  
 
OPI - I Saw…U Saw…We Saw…Warsaw nails

This is my first true navy and I really like how it looks, I especially like it as a matte, but I’m a sucker for matte so that is expected. I love using new polish, I got this one (and three others) with birthday gift cards at Ulta. I still have more birthday Ulta money and now I also have a coupon, I’m pretty sure this weekend is going to include staring at nail polish (shocking).
Please disregard the ugly hangnail

The formula for the blue was consistent with other OPI polish; I’m wearing two coats and had full coverage. Unfortunately I decided I needed to finish off my last pitcher of beer-garitas by myself before starting this manicure so I had quite a bit of clean up afterwards. The blue just didn’t want to leave my fingers once it made contact, I really feel like blue is the worst for that.
I should do animal print more often

When someone at work saw these they asked if they were moons and stars, now I really want to use this blue as a base for cute moons and stars. My post it list isn’t getting any shorter, there are just so many fun things you can paint on your nails!

Monday, September 9, 2013

Grumpy Cat nails


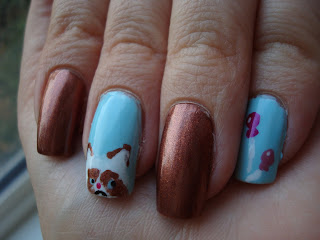
I’m sorry for the long wait to see my birthday nails, but I hope they are worth the wait J. I was thinking for a long time about what nails I wanted to do to commemorate my 30th birthday and it wasn’t until a few days before the big day that I finally settled on the design. My fellow nail lover friend Patty is the one who suggested I do Grumpy Cat nails, and I can’t think of better nails to have when turning 30.

I surprised myself with how little flash these nails had but I ended up liking the solid brown next to the designed nails. For this manicure I used Sally Hansen CSM Barracuda, OPI Brisbane Bronze, Aphrodite’s Pink Nightie, and Pompeii Purple, and Orly Liquid Vinyl and White Tips.
Grumpy Cat nails

To create the adorable yet grumpy kitty on my middle finger I used a corner piece of makeup sponge and sponged on the white first. The triangular shape of the sponge helped define her ears. I did two layers of the white before I sponged on the brown; I always forget how much I love this brown!
Nothing says turning 30 like a disgruntled kitty on your middle finger

To get her tiny angry mouth I used my smallest dotting tool and used a stippling method to tap the color on. My original idea was to put a party hat on her but she took so long to do that I didn’t want to risk messing her up. To make it a little more birthday themed I put balloons on my thumb and pinkie. My right hand has balloons on the pinkie, middle, and thumb.
 
I can’t believe I missed her at the state fair

I had this manicure when I went to get a facial after my birthday and I got asked one of my favorite nail questions by the salon lady. She asked if I paint them before I put them on, I’m sure a loser that I love being able to say ‘no, actually they are real’. I hope my birthday nails were worth the wait and that you love Grumpy Cat as much as I do J

Wednesday, August 28, 2013

Interview nails


I generally don’t talk too much about my job, but this time it relates to my nails so I’m going to go for it. I really like my job, that isn’t something I thought I would be able to say a year ago. I’ve been filling in at work as an administrative assistant and I found that being an admin is something I truly enjoy, and not just because we have a whole day dedicated to us. There is something about the controlled chaos of being an admin that makes me happy to go to work, believe it or not, Monday is my favorite day of the work week, how freakin ridiculous is that?

I mention my job because in the last couple of weeks I was able to apply and interview to make my job a permanent position, of course, as soon as the job posted I started thinking about interview nails. This blog has two different designs because I had two different interviews. For the first manicure I used Orly White Tips. They are perhaps the most boring (read professional) nails I’ve ever done.
Interview nails

I was really nervous about my first interview and wanted to make sure my nails were really professional and not too flashy. These turned out just how I wanted, in person the line was a nice dark gray and I wore a dark gray skirt so they coordinated well. For my second set of interview nails I used Orly Liquid Vinyl and White Tips and China Glaze Rich & Famous. These nails are a bit bolder J
These nails say ‘hire me’

After the first interview I realized my nails didn’t really show at all, so I decided to have super fun nails that matched my outfit and made me feel fancy. This is only the second time I’ve tried a half moon manicure and I love how they turned out. To cover up the rough edge between the two base colors I put in the dots and I must say I really like how that turned out.
I guess they could have been more professional

I really liked both of my interview manicures; they gave me that little extra confidence that I needed going into the interviews. The best part about the manicures is that they were part of successful interviews; there really isn’t anything more I could have asked from them J

Sunday, July 28, 2013

Doodle nails


I’m not a very social person, as evident by the fact that I’m in my PJs writing this blog on a Friday night. Despite my non social nature, I have somehow managed to make plan for every weekend between now and labor day. This is unchartered territory for me; generally my weekends are filled with Netflix, not people. Truth be told some of my plans are more exciting than others; I can’t believe I get to go to Vegas in two weeks! All these plans mean that I have a lot of nail designs to plan out J

I love these nails the longer they are on my hands. They are so cute and fun! For this manicure I used Orly Liquid Vinyl, Lemonade, and White Tips, Sally Hansen CSM Barracuda, and China Glaze Rich & Famous. I have used Barracuda so much since I got it; I think it is officially one of my favorite summer colors.
Doodle nails

It took me a few tries before I got the black lines the right thickness, that is why the yellow flower on my ring finger is a bit wonky. I ended up using the smallest dotting tool I had, I think the end of a toothpick would work well too if you didn’t have dotting tools.
They are just so much fun!

Sponging these made me remember how much I love the look of sponged nails; I really need to come up with more ideas so I get to sponge more. I’ll have to get on the interwebs and do some searching J Even though these nails are really colorful, I feel like they aren’t as gaudy as some of the other designs I’ve done.
I love them so much you get three pictures

I broke a thumb nail a couple of days after I painted these and ended up having to cut all my nails. As much as I liked this design on my long nails, I think I liked it even better on my little stumpy nails, so I guess there is a silver lining to the break.

Thursday, July 18, 2013

Wizard of Oz nails


I don’t have a fun way to start this blog so I’m just going to talk about my nails. I have a post it that I keep a list of nail ideas on and chose this one off the list to do. Without thinking about it I ended up doing two movie themed nails in a row, perhaps I can think of more and do a whole series of them. I feel like I should mention that I don’t actually like the movie Wizard of Oz, the monkeys scared me as a kid (that’s a lie the monkeys still scare the shit out of me). Despite the terrifying monkeys I thought the movie would make for a good muse for my nails and I was right.

These nails are distractingly gaudy, they may even be ugly. For this manicure I used quite a few colors, Orly Skinny Dip, Liquid Vinyl, and White Tips, Sally Hansen CSM All Fired UP, Gilty Pleasure, and Butterscotch, China Glaze Ruby Pumps and Paper Chasing, and OPI DS Radiance.
Wizard of Oz nails

My pinkie is supposed to be the Emerald City but I think it looks more like a pineapple, I guess this means if I ever do Spongebob nails I know how to make his pineapple under the sea. The red nail is supposed to be for Dorothy’s ruby red slippers, I was so happy when I found the red for it and then saw the name was Ruby Pumps so I’m pretty sure that was meant to be.
I’m not sure where the tiny divots on my Tin Man came from

My other nails are for the Tin Man, Dorothy’s dress, and the yellow brick road. I bought Butterscotch for Winnie the Pooh nails, but I thought it made for a good road.I was really happy with how the Tin Man nails turned out, since he was my favorite I had to include something for him.
I liked three pictures, so you get three pictures of these

These nails are fun but not very flattering; they are a bit too bold even for me. I think if I were going to do them again I would choose just two designs and not five different ones (I’d keep the pineapple of course). Now let’s see if I can come up with another movie theme, perhaps one that doesn’t distract me so much J


Tuesday, July 2, 2013

Tuxedo Wedding nails


I know I’ve mentioned it before, but whipped vodka is delicious. My brilliant friend Jackie introduced this delicious beverage to me last year and I’ve taken care of my fair share of bottle of it since then. Recently Jackie came through with another dazzling idea and suggested I mix my whipped vodka with cranberry juice. It tastes just like cheesecake! I don’t know how the combination of cranberries and whipped cream make cheesecake but it does and it is amazing. This might be my new favorite drink and I have Jackie to thank for it, thank you Jackie!!!

I wanted to end my wedding themed nails with a fun design and I think I accomplished that goal. For this manicure I used Orly White Tips and Liquid Vinyl, and Sally Hansen CSM All Fired Up and Wine Not. I think these nails would be perfect if you were the best lady in a wedding (as in a lady best man). They are super cute aren’t they?
Tuxedo Wedding nails

When I was starting these nails Jackie suggested that I do boutonnieres and I’m very happy she suggested that because they really set off the overall look. Not surprisingly, the tuxedos took quite a while to do so I’m happy I decided to only do them as accent nails. The other nails also make the overall look a little classier than they would be with all little tuxes.
And of course there is a dog hair, sigh

These nails are just fun, they are not technically the best nails I have done (I made a lot of mistakes) but they are some of the most fun. I had these nails on when I went to Ulta today and I had two different sales ladies grab my hand to look at them closer. One of the ladies actually recognized me when I came in and asked to see my nails right away because she knew ‘they would be cool’. I’m starting to feel like a celebrity there J

Thursday, June 13, 2013

Rubber Duckie nails


When I moved into my first apartment I really wanted to have a rubber duckie bathroom, nothing says independent adult like a bathroom fully of yellow ducks. I got rubber duckie everything, shower curtain, trash can, soap dispenser, even wall art, that bathroom was so full of ducks you couldn’t walk into it without having hundreds of beady black duck eyes watching your every move. I feel like I’m somehow making my bathroom sound sinister but it was quite cute actually. I finally ditched the ducks when I moved into my house, although I do still have bride and groom ducks hidden in the closet.

I would say I did these nails to celebrate my duck bathroom of apartments past, but I really just did them because they were cute. J For this manicure I used China Glaze For Audrey and Sea Spray, Orly Skinny Dip and Liquid Vinyl, OPI Alpine Snow, Ulta Sun-Sational, and Sally Hansen Strobe Light. I’m very happy with how these nails turned out, I especially like the marbleized soap bubbles.  
Rubber Duckie nails

To do the bubbles I dipped my dotter in three different colors, the dotter made the color mix in some places but also have separate colors in one dot. This is similar to the technique used in water color nails and it really makes me want to try that (what don’t I want to try though?). I was surprised with how easy the ducks were to do, the ducks on my right hand aren’t bad but the left ring finger duck is definitely the best one.
Rubber Duckie you’re the one

These nails were really fun to do and they didn’t take long at all, start to finish I had these done in less than an hour (which is pretty good for me). They do cause me to sing the rubber duckie song from Sesame Street but that is a price I’m willing to pay J

Monday, June 10, 2013

Matte Black Tiger nails


I’m a huge fan of Sally’s, I’ll pause a moment for you to recover from what I’m sure is great shock and surprise. I had to go to Sally’s this weekend because I was running low on SV base coat and I had a $5 coupon burning a hole in my purse. While at Sally’s I was perusing the nail polish when I couldn’t help but over hear another customer ask the sales lady for advice on water marbling. The sales lady didn’t really seem too excited about water marbling and I couldn’t help but completely butt into their conversation and offer my unasked for advice. It makes it a little better that I happened to work with the other customer, a fact that I wasn’t aware of until after I jumped in like an interrupting goat. I get way too excited about nail art; I think I may have frightened them with my enthusiasm, oops.

This is the manicure that has been on OPI’s main site for what seems like months now, ironically I didn’t use any OPI polish when I did it, sorry OPI. For this manicure I used Orly Liquid Vinyl and essie Matte About You. I’m so happy I got a new bottle of Liquid Vinyl I didn’t realize how bad mine had gotten until I used new polish.
Matte Black Tiger nails

These nails are much more subtle than my normal nails; a couple people even thought that I just had plain black nails until they saw them up close. I had a really hard time taking pictures of them without the stripes completely disappearing. To do these nails I used a striper to put glossy black lines on a matte black base. I went to bed too soon after I was done and since I didn’t have topcoat to protect my nails I ended up with the lovely sheet marks you see in the picture.
It’s really hard to stay up long enough for nails to fully dry

I thought these nails were just ok, they aren’t the type that I’m desperate to do again or anything. I did like having nails that weren’t so gaudy for once, but I’m starting to think that gaudy nails are more me. J

Friday, May 31, 2013

Butterfly nails


I’ve had the theme song from Reading Rainbow stuck in my head for the last three days because of my nails. I’m a truly terrible singer so it is really bad when I have a song I love stuck in my head because I want to sing it and my singing causes inner ear bleeding. I was shocked to find that a large number of my co –workers didn’t know the song from Reading Rainbow, it was such a huge part of my childhood I can’t believe that anyone close to my age wouldn’t have also loved that amazing show. Butterfly in the sky. . . ahhhh memories.

For these nails I used Orly Prelude to a Kiss and Liquid Vinyl, Ulta Sun-Sational, OPI Alpine Snow, and China Glaze Riveting. These nails were a pain in the butt to do, they took for freaking forever, and I’m not super pleased with how my line work turned out.
Butterfly nails

Although they are far from perfect, they are pretty cool. They look much better from further away (something I say about every manicure that uses sponging). I was so excited to start them that I sponged my thumb before I put on my base color which is why it is much lighter than the other nails. I would have taken it off and started over but instead I was too lazy, I can justify it though by saying that I wanted you to be able to see what it looks like without a nude base color.
I can fly twice as high. . .

I really liked how the gradient turned out on these; I did the same colors in gradient for my pride nails so I knew I liked them together ahead of time. The glitter in the orange is just downright fun and it works so nice with the bright yellow.
Just take a look . . .

I wonder if Reading Rainbow is on Netflix, I bet it is like Milo and Otis though and it will lose it magic now that I’m an adult. Hope you like my butterflies J